Posts

Showing posts from February, 2023

Tutorial - Project Update

Image
 In the last tutorial I had for my major project this term, I talked with my tutor about some updates I had on my project and some more information I need to add. I decided to change my location from Duisburg, Germany to Frankfurt, Germany because it is a better choice of a city that has a bigger population and is, in general, a more financial and profitable city that supports better success in business, I will also do research about the location/demographics and accessibility. We also discussed my parking lot design, I will do an additional design which will be a second-floor underground parking lot where I will include disability parking spaces.

Further research - Tom Fruin

Image
 Tom Fruin is a contemporary American sculptor, he studied and graduated from the University of California (Santa Barbara) in 1996 and now He lives and works in Brooklyn, New york. He is known for his large installations, creating "monumental sculptures" of structures that touch abstraction. He works within a lot of art projects that connect with architecture as well like developing a form of a house, but other objects as well such as billboards, flags, etc.  He tries to make his projects sustainable so it is available to the public by using "reclaimed materials". He works with a variety of materials on his urban projects, like steel, plastic, scrap materials, and plexiglass that he collects from all over Chinatown and turns them into "striated grids". Fruin gets his inspiration from all over New York. His projects are internally illuminated and sometimes build in public spaces, they "dim" in time with their own "rhythms" that create co...

Floor-plans Results / Dimensions - Project Development

Image
  These are the floor plan result and dimensions of the building and spaces.                                                                      Building Tower1/2 The height for the tallest tower with 10 floors is 45 meters by itself and 50 meters with the exterior ceiling design. The height for the smaller tower with 6 floors is 27,5 meters and 30 meters with the exterior ceiling design. The width and length for each tower is 25x25m and 20sx20m  Office The whole office is 4,5 x 3,5 x 5 x 4 x 8 x 6 m  The bathroom is 2 x 1,75 m Parking lot The parking lots are 15 x15m in width/length and each parking space is 2,75 x 5,50m 

Floor-plans for office room process - Project Development

Image
This is my process of creating one of the offices' floorplan.  First, I opened a new document, then selected  'floorplan' in the top left corner, then clicked on 'add room' and chose the L-shaped room option, and placed it as the floor, I adjusted the size by clicking on the walls and dragging them outwards, after that I added a room in the top right corner for the bathroom with the "add walls" tool on the top left corner.  Then I added doors and windows by clicking on the walls, then "edit" on the toolbar that appears, and then chose a door for the entrance, toilet, and full-size windows.  Then I decided to add some furniture to show a clearer vision of how the room would look and where everything would be, I did that by going to 'products' on the top left corner and then clicking on 'furnish". I added an office with a chair and armchairs in front of it, a few storage units on the bottom wall, a sitting space with a sofa, a tabl...

Floor-plans ground floor for tower 2 mall process - Project Development

Image
 This is my process of creating the floorplan for the ground floor of the second tower which will be the mall. After opening a new document I started by creating the shape, I did that by selecting 'floorplan' in the top left corner, then clicked on 'add room' and chose a square, then with the 'add walls' tool from the same corner, I cut out the edges and created a polygon.  Then i added the extensions on the walls with the "add walls" tool and also added a dark-colored flooring by clicking on the floor and then "edit", then going to the "style" section on the right, and then choosing "flooring", to make the outlines more visible.  Then I started adding rooms and section on to the space with the "add walls" tool Then i added the elevator in the middle and created L-shaped fountains with the "add walls" tool, I left gaps on each side for the elevator doors and then added materials to the rooms, elevators,...

Floor-plans ground floor work/offices tower 1 process - Project Development

Image
This is my process of creating the ground floor of the offices tower.   First, I opened a new document  Then I clicked on 'floorplan' in the top left corner, then clicked on 'add room' and placed a square for the floor. then I cut the edges out to create a polygon, I did that by selecting the 'add wall' tool on the top left corner from the 'floorplans' category  Then I started adding the extensions of the wall with the  'add wall' tool again and started creating squares and rectangles from the inner and outer walls. Then I added a flooring material by clicking on the floor and then "edit", then going to the "style" section on the right, and then choosing "flooring". I chose a darker-colored material to make the section more clear. I also added rooms for the offices, bathrooms, sitting areas, and the elevator.  Then I added materials for the rooms and added two more section spaces on either side of the elevator for th...

Parking lot design / process - Project development

Image
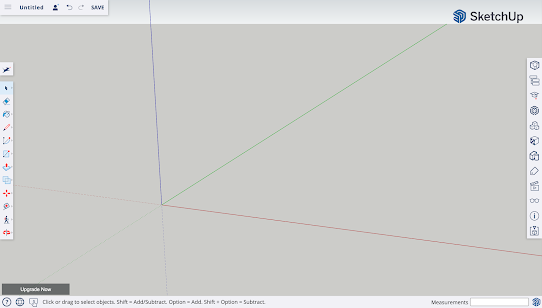
This is my process of creating the parking lot of my building for my project on SketchUp.                                        First, I open a new document by clicking on "create new". Then I started by drawing a base with the pencil tool on the left toolbar.  I added walls to create the space with the pencil tool again and then drew on an entrance where the opening from upstairs will lead to the parking lot. I then clicked on the entrance and erased the wall by clicking on it and then on "erase". Afterward, I tried to create the inclined road with the pencil tool. Then I started adding separators/cats eyes for each parking space on a line I drew on. I found the separators on the "3D Warehouse" from the right toolbar and search on the search bar "parking lot". Then I drew lines in between the parking spaces and did the same thing on the other side as well. Then I drew another line ...

Design elevations - Project Development

Image
 These are the elevations of my final design building.                                                                           Top Elevations Left Elevation  Back Elevations Right Elevation Front Elevations