3D Floorplan Process / Results - Project Development
This is my 3D floor plan process. To create this I used Homestyler and created the ground floor which is the reception along with some sitting areas.
First, I opened a new document and created the room by clicking on "create room" in the top left corner.
Then I added two sliding doors for the entrance. I did that by going to the same setting "create room" and scrolled down to the "door and window" category and chose the sliding door option with the design I wanted.
Then I added full wall windows because I couldn't figure out how to create the triangle ones. (Later in the process I figured it out and included them) I found the windows from the same category.
After the base was done I started placing furniture to test out the placements. For that I went to the "model library" setting which is the fourth icon on the left side, and then clicked on "catalog", there were different furniture categories, I mostly used the "office" and "art and decor" ones. I edited the sizes by clicking on each object and then on "scale" and customized them with the given arrows. I also changed some of their materials by clicking on them again and then on"replace material", where I chose different woods, metals, and fabrics.
After some of the furniture was placed, I started testing out flooring and wall materials by clicking on the walls, then on "customize wall" and then materials, and then followed the same steps for the floor.
Afterward, I figured out I could create the triangles on the walls, by clicking on them and choosing the same setting "customize walls" and then clicked on the "line" tool on the top setting bar and started drawing different triangles. Then clicked on "material" from the left toolbar and chose different coloured glasses.
Then i added the lift, by creating walls with the first "create room" tool.
Then I added the sliding door for the lift and customised the reception around it.
Later on, I decided on a different flooring, I picked marble flooring and chose a greyish walls that separated the bathrooms.
Then I customized the lift doors by clicking on them, then "replace material" and chose the same marble for the framing and metal for the doors. I also added a dark gray colour for the lift which would match the ceiling.
Then i started adding more decor and details.
Instead of leaving just a dark grey ceiling, I chose this design instead which adds light lines.
After adding some more details I started to like the result better, but the only issue was that the triangle glass walls I added weren't showing from certain angles.
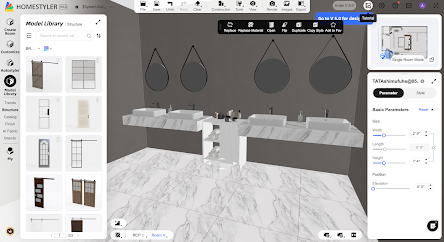
I then started to work on the bathrooms using the same tools and setting and adding sinks, decor, etc.
These are the results, I tried to angle the corners and rooms as best as possible to get the coloured glass effect to show so it wouldn't look so monotone with the greys. Unfortunately, I couldn't download a virtual document so I will be including this second 3D piece as pictures in my project.


.png)

.png)
Comments
Post a Comment